DIY Open Concept Bookshelves


1. CREATE AN INSPIRATION BOARD
There are so many different styles of bookshelves nowadays and it’s easy to get overwhelmed when deciding what direction to take a piece in. I knew I wanted something modern, Scandinavian inspired for my wall shelf, so I took to Pinterest to see what was already on the market. Two things I learned from this research 1). I was drawn to the white more than the natural wood and 2). Styling is key with this style of shelf.
I also discovered that open concept bookshelves of this scale are insanely expensive and in-home delivery is even more pricey. This only made me want to design a shelf myself even more.

2. SKETCH OUT A DESIGN CONCEPT WITH MEASUREMENTS
Don’t be intimidated by this step if you aren’t a designer…you’re just getting an idea on paper.
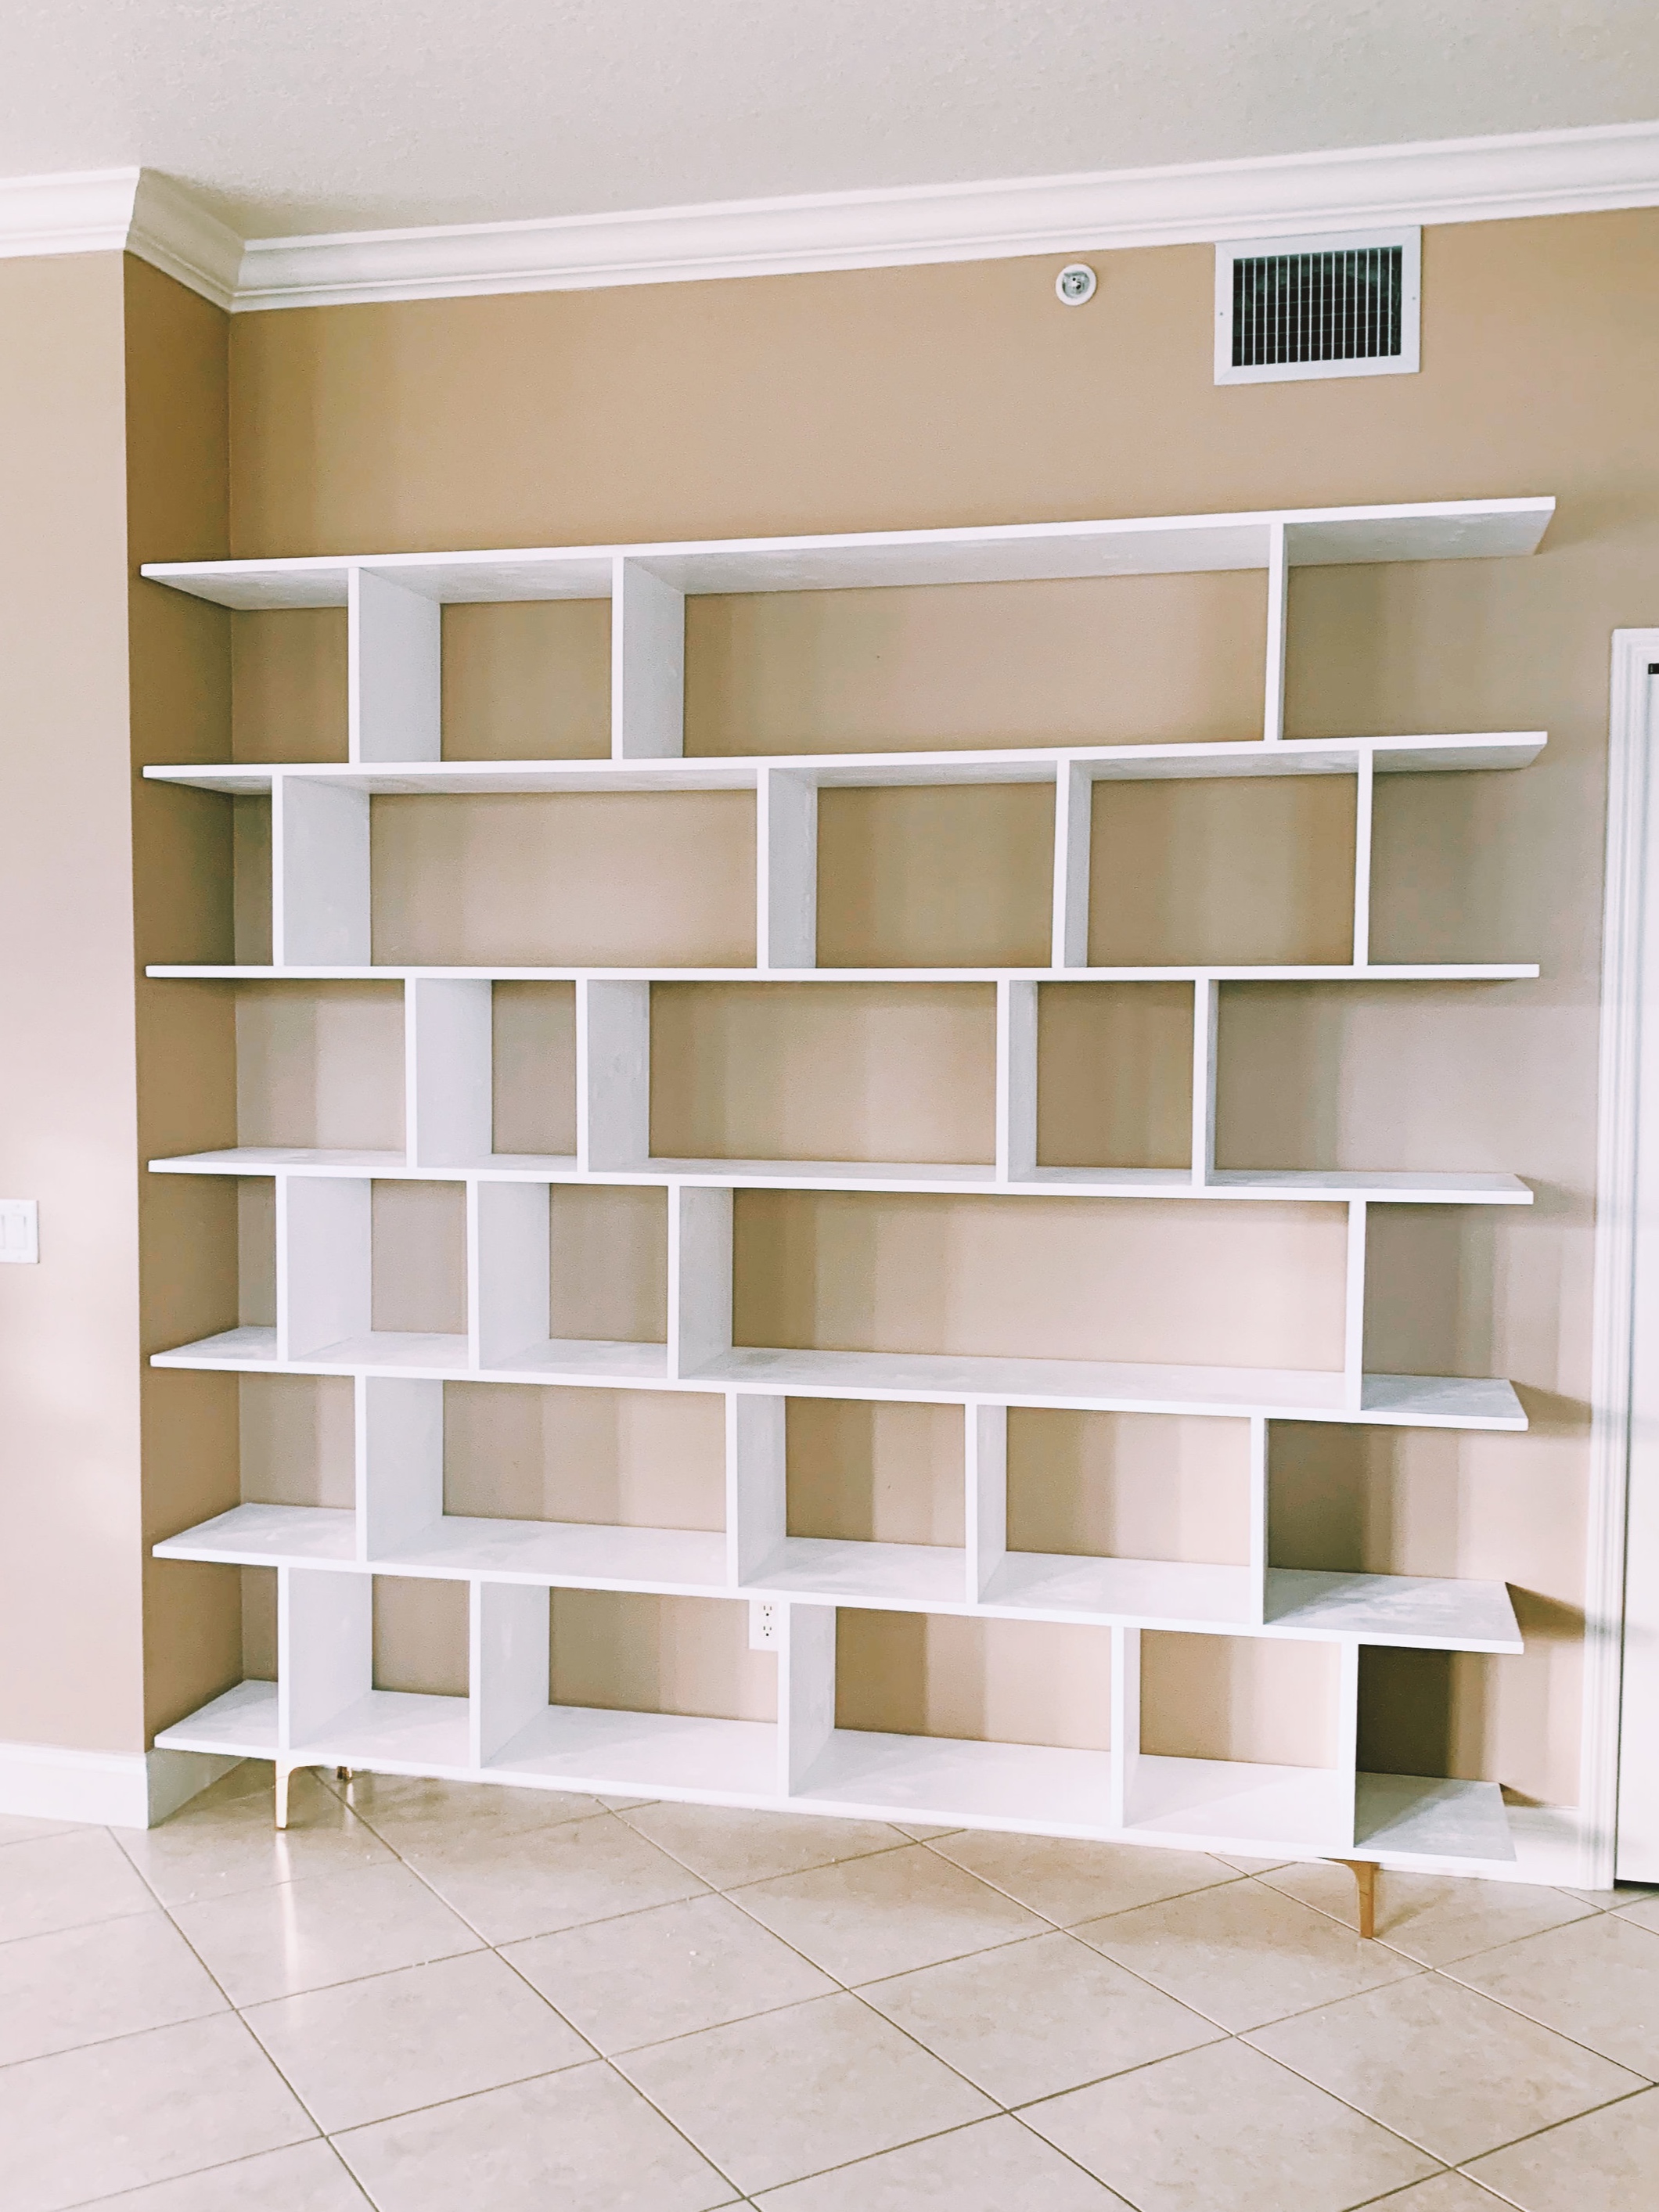
Since the ceilings in my house are pretty high, I knew I wanted a book shelf that went nearly to the top, without hitting the air vent. I also knew that I wanted the shelf to be 84 inches long in order to fill the entire open space on my wall. I started doodling a few ideas, making sure to leave some shelves significantly open to give it a very airy feel. I referenced my inspiration board while drawing a few sketches.
From there, I sketched out my ideal shelf, then went back in to do the math. Check and re-check the math! It’s easy to get numbers mixed up here, so before you start cutting wood, check that all of your calculations are correct. Here is my chicken-scratch of a sketch for comparison.

3.PRE-CUT WOOD & PAINT
Once you know your measurements are correct, it’s time to head to your local lumber store. If you aren’t leaving the wood natural, I’d highly recommend painting all of the pieces outside or in an open garage and let set overnight.

4.BUILD UP, NOT SIDEWAYS
Once all the wood is brought inside, it’s time to start assembling. Build layer by layer and make sure that every piece is evenly aligned before drilling and nailing. Pencil in where all of the pieces should go before hand if that helps you get a better visual (this is easily disguised under one additional coat of paint at the end of the process).


We tilted the shelf right side up when we hit the half way mark, just to make sure it was looking good.
5.ADD FEET LAST THEN NAIL TO THE WALL
Once all of the wood pieces are assembled together, it’s safe to attach the feet (if so desired). Also, because this shelf is solid wood, it needs to be as stable as possible, so nailing to the wall is a must.
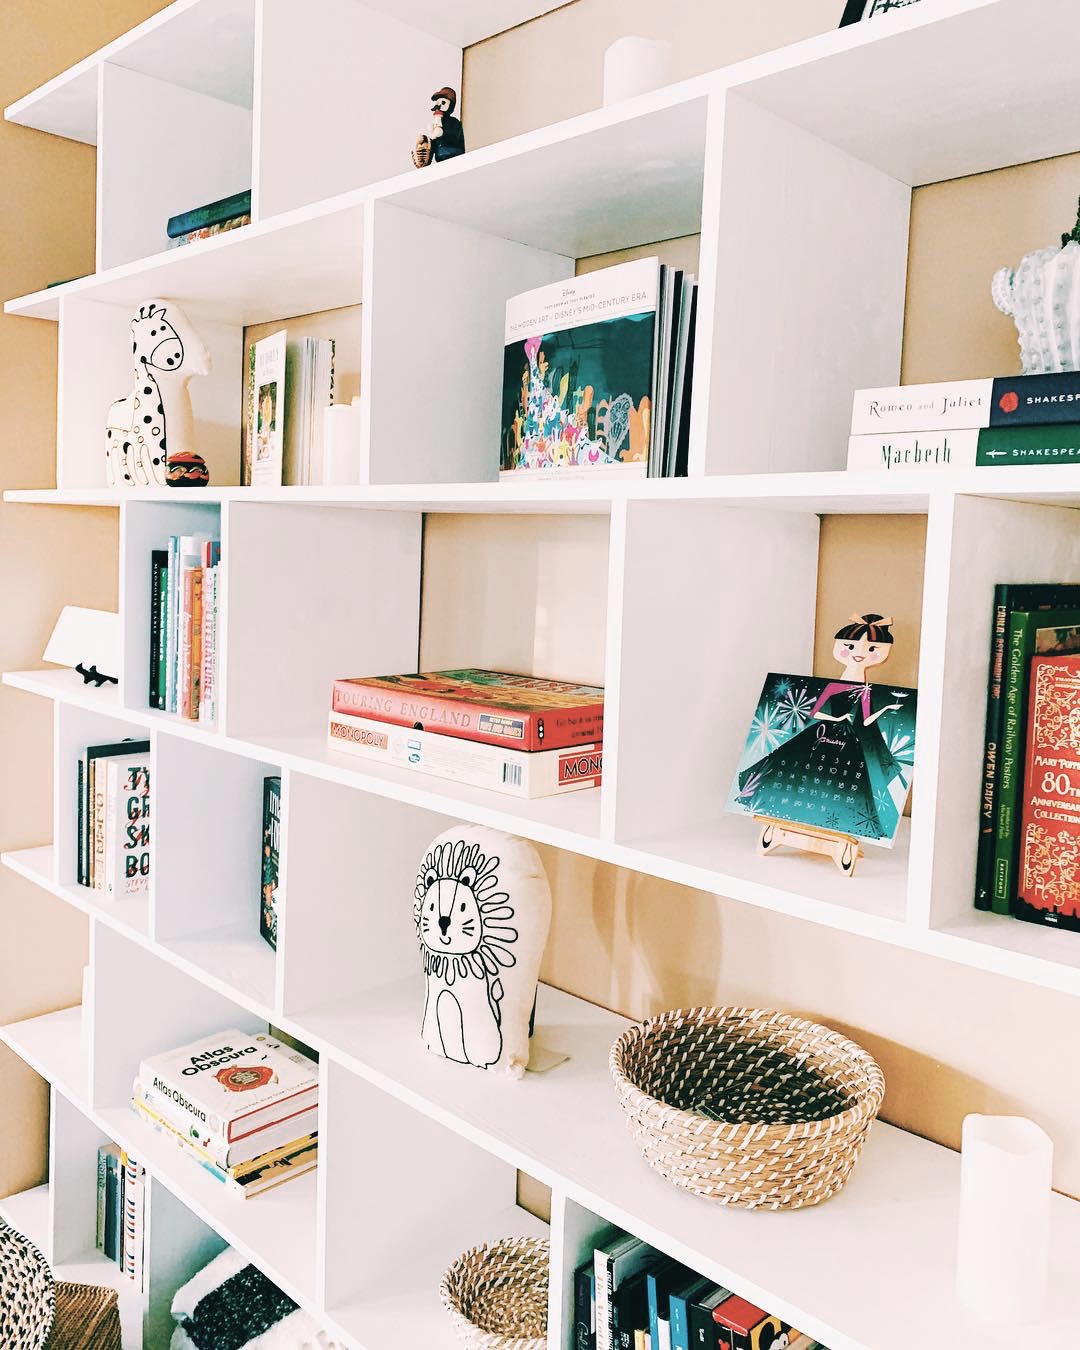
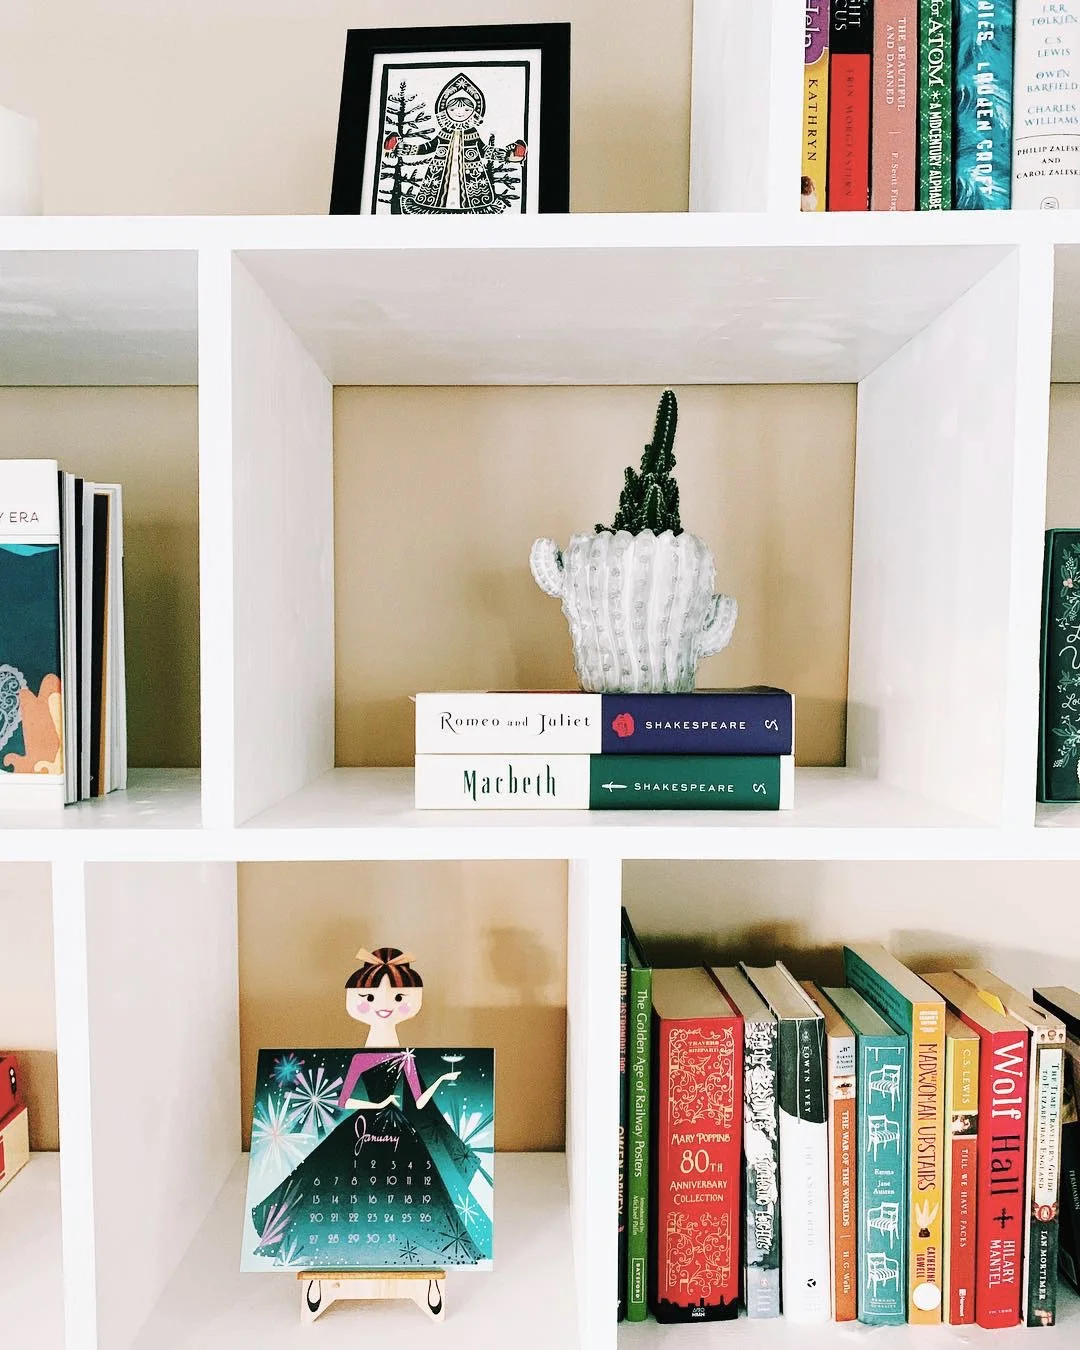
6.STYLE THE SHELVES
Finally, the fun part! The key for me when styling is to mix textures. I know this shelf is primarily for books, but I never want to overcrowd the spaces and make it feel jammed. The best way is to break up the books is with textured objects like, baskets, pieces of artwork and plants. Also, standing some of the hardcover books upend facing out so they act as a display piece adds additional depth. This will also help create movement throughout the shelf so your eye doesn’t get stuck on just one area.
There's no right way to style shelves, so just do what feels right in your space.

This was the majority of process and turned out MUCH cheaper than purchasing a solid wood shelf from a furniture store. This same idea could even be translated into closet or laundry shelf organization.
I’m so pleased with the outcome of the bookshelf and hope to do more DIY Home Decor posts in the future.